Monday, October 21, 2013

Caltech's Greatest Creation: The Making of Audrey II (Part 5: Blooms, Graspers, and All the Rest)


Blooms

  • They need to be able to be put on and taken off extremely quickly (Orin only has the first 2 verses of the finale to put his on)
  • We wanted ours to open and close.  Time constraints made this only marginally effective for us

We once again refer back to our balloon and papier-maché trick.  The bloom heads for us were the same size as our Pod 2, so much of the build was the same.  

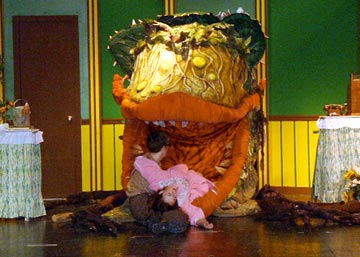
Once the papier-maché was set and cut open, we added some elastic straps into the pod head: for the lower jaw, the elastic went around the neck and was warn like a necklace; for the upper jaw, it went around the head and was warn like a baseball cap.  The ideal effect is that the lower jaw sits still on the actors’ chests, and they can close the jaw by lowering their heads.  Our lower jaws were a bit, uh, bouncy by showtime.  We then just glued in some red fabric around the jaws, cutting a hole for the face to poke through, et voila, blooms. 
Our Audrey 1 helps mark the cutout for Orin's face hole in the bloom.


For added effect, we took some large leftover leaves and fashioned some necklaces out of them, to cover up as much of the body as we could, for that extra plant-like look.

Graspers

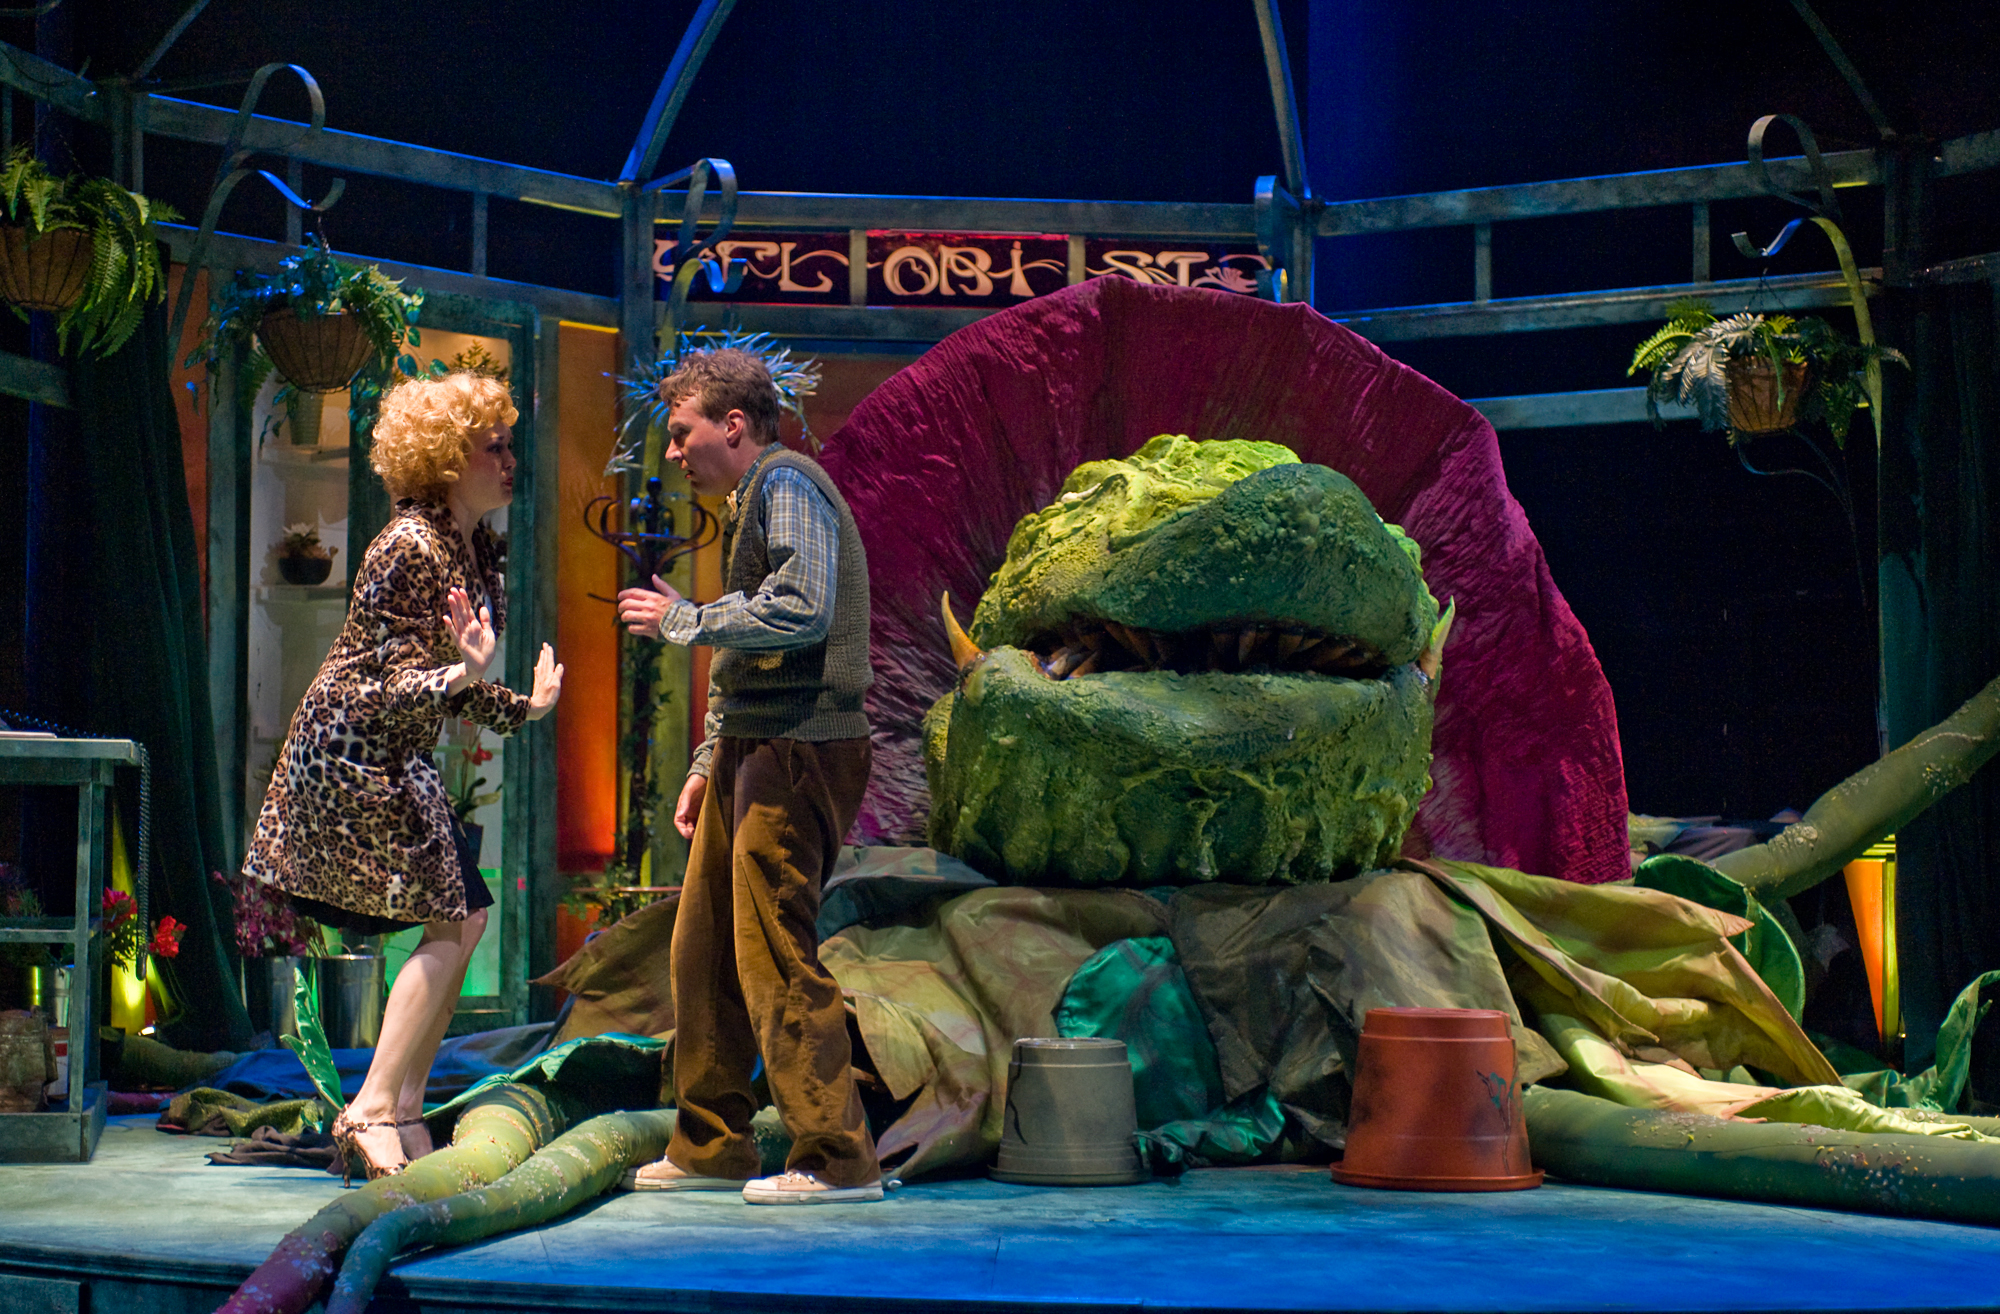
  • These need to be able to grasp Audrey 1 during Sominex/Suppertime II
  • They have to be operated without being seen.
These were pretty simple.  The graspers come in 3 sections: The hand, the forearm, and the upper arm (like with human arms).  For the forearm, we took some PVC, and covered it with brown fabric, then stuffed the brown fabric with batting, as with previous roots.  For the hand, we just added a 90o elbow joint at the end, to give the effect of fingers. For the upper arm, we added an extra length of root fabric, without PVC, going from the elbow to the plant, attaching it to the armature between scenes with a heavy duty carabiner. We had the upper arm go actually go off stage, through the curtain in the shop, so the forearm would stick back in through the same curtain.  The arm could then be operate just behind the curtain by holding onto the PVC forearm at the elbow and just lifting or moving it.  The PVC had a massive amount of give, but it was sturdy enough that it wouldn’t break.  We used our Mushnik to operate it, because a) he wasn’t going to be onstage again til the finale anyways, and b) it was digesting him that allowed Audrey 2 to grow the arm in the first place.  

The dotted line is the curtain to backstage, so the handler could grasp the piece of PVC sticking out


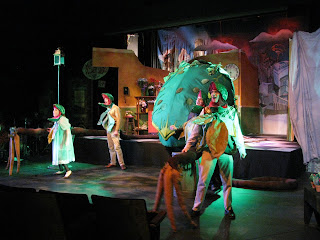
We only used 1 arm for the Sominex/Suppertime 2 scene, but we built an additional arm to come onstage for the finale.  During the finale, we had one of our “dead” actors hook on the second arm as they came on stage with it.  Each actor then grabbed a joint (elbow or wrist on either grasper) and operated them onstage. 

Conclusion:
And that’s that! Now you know how we made Audrey 2 at Caltech.  The process of making it ready for showtime, which literally took us right up until showtime, was absolutely exhausting.  Should you find yourself putting on the a production of Little Shop of Horrors, I highly recommend having a full squad of builders helping right from the beginning, and giving yourself more than a month and a half to build.

Keep an eye out for a video version of this behind-the-scenes making-of, sometime in the near future (hopefully near, but definitely future).

Acknowledgements:
So now I’d like to formally thank those who helped make this possible.  In all of theater, there is no part I would rather have played than Audrey 2, so having that opportunity was pretty awesome.

Lead Designers:  Sarah Slotznick and Zachary Tobin
Master Welder: Marty Gibbons
Plant Dressing: Kayla Maddox
Executive Construction Assistant: Casey Handmer
Construction Assistants:  Holly Bender, Amit Lakhanpal, Doug Smith, Sophie Ballner,  Lynne Cooper,  Sarah Cooper, Jan Biferno, Mike Biferno, Melissa Biferno,  Kim Furuya, Anne Hyvarinen, Alex Jose, Jetson Leder-Luis, Dave Seal, Jeff Sherman,  Ben Solish, Miranda Stewart, Christine Sun, Ben Sveinbjörnsson, Phoebe Kellog, Stagehand Andre
Original Voice: David Seal
Original Puppeteer: Zachary Tobin


Part 2: Pod 2 and the Cuttings
Part 3: Pod 3
Part 5: Blooms, Graspers, and All the Rest


Turns out, dancing on stage with an extra hundred pounds burns a lot of calories, so we went to Denny's after opening weekend to refill some of them.


Caltech's Greatest Creation: The Making of Audrey II (Part 4: Pod 4)

Pod 4

This is it. The big Kahuna. The money maker.

I’m proud to say, after a cursory inspection on YouTube,  Caltech’s final Audrey 2 pod may be one of the biggest, by volume, put to stage, at a commanding size of 6’ diameter and 8’ length. The only ones I found comparable in size were the ones built professionally by the folks who worked on the Broadway Revival production.  Even our penultimate pod was comparable in size to many other productions’ final plants.  And it was 100% human-powered.  I know I know, at Caltech you expect something with gizmos and motors, but for a handful of people to design and build in a month and a half in our spare time, we had to make something that functioned as a simple (if gigantic) puppet.

Before we can start working on this behemoth, we need to have a real good idea of what we want it to look like.  Pod 4 doesn’t follow the same cookie-cutter pattern as the previous pods. It has more building options, because its size allows, literally, more room for creativity. Will you operate each jaw independently? Will you operate one jaw with the left arm and the other with the right? Will the pod be mounted on the floor and stationary?  The answers to these questions will depend on what you really want the plant to do (the only necessary functions are talking and eating people whole), and your construction capabilities.  In the end, we decided these were what we really wanted Pod 4 to do:

  • Open and close.  Just like with previous times, only much slower and heavier.
  • Range of Motion.  All pod 4 technically needs is yaw control (turn left and right), but being able to twist and turn greatly increases its emotive qualities.
  • Eat people, whole. This is the big trick for Little Shop--you have a man-eating plant, you better well have it eat people.  You don’t have a plant that eats people, you don’t have a Little Shop. of Horrors.
  • Crawl around. By the time Seymour bites it, we find Audrey 2 no longer needs him. It has become a completely self sufficient organism, and as a last bit of intimidation, traverses the stage during the finale.
  • Look big and intimidating.  Audrey 2 is the centerpiece of the show, and pod 4 is your chance to make it shine.

This was the basic design we were going for

Ultimately, we decided on the following template:  Pod 4’s lower jaw would be harnessed to the puppeteer’s body, and the upper jaw would be operated by handles.  

The most important part of the construction for Pod 4 is the frame.  Again, we had the advantage of being able to weld together a large armature from pencil-rod steel, giving us a light, flexible, strong frame.  Theoretically, one could obtain similar, if less sturdy results with duct tape.  Many, however, opt for fiberglas or resin for a frame that doubles as a shell.  


Our welder puts together the upper jaw

And here is the completed lower jaw frame.


We use a surplus ALICE backpack frame to harness the puppeteer onto the lower jaw, with additional aluminum struts to reinforce the contacts. We put the backpack pretty close to the center of the pod, so that it just barely leans forward;  with the size of the pod, the puppeteer will need all the torque they can get.  You’d be surprised how far you can have the puppeteer into the frame and get away with it, as long as they’re properly covered later.  We used large pipes for handles on the upper jaw, with reinforcement at those contact points also.  A simple hinge in the back connects the two jaws together.


Some shots of me strapped in the completed frame, testing out its range of motion.

To give it the plant look, we again opted for felt.  This time, because of how complete the armature was, we only needed some quilt batting to cover the frame and soften the edges, before laying felt on the outside. Warts were again made of foam, they are just now larger than with pod 3.  We added roots sticking off of Pod 4, much like with Pod 3, but more numerous and larger.  Just sew them on wherever.
Our plant dresser sews the batting onto the frame.  The frame was complete enough that we didn't have to come up with crazy foam tricks like on pod 3

Felt is added.

And here's the pod with the outer shell on, but no mouth fabric

While Pod 4 is a killer plant in Act 2, it’s not supposed to actually maim your actors.  But that’s precisely what a thinly-covered 8‘ armature will do without any safety features.  We used PVC foam insulation tubes to give the plant lips.  We also left a gaping hole in the armature at the front of the bottom lip, where a few actors lay down to get eaten.  We filled the area with copious amount of foam, to proved support for the lip and for the actors. And once again, a green tube of fabric provides a stem. This time, though, our stem looks more like a neck, to cover up all the fun stuff that’s going on under the plant

Rehearsing Mushnik's death, you can see the impact-absorbing crumple zone that is the lower lip.

Finally, as usual, is the mouth lining. Because of the size of the puppet, we could actually show texture in the mouth using different fabrics.  Remember, though, to use something see-through around the uvula area, so the puppeteer can see what they’re doing. 


Full range of motion on the jaw hinge with mouth fabric.

And here you can see 3 of the fabrics we used for the mouth.  The uvula is made up of a see-through jersey fabric, so the puppeteer can see. Everything else is at your discretion.  Also notice the teeth.  They're just little triangles of foam we glued on. Just having 8 teeth is surprisingly effective at making Pod 4 look intimidating.

 To swallow people, we used a slit at the bottom of the mouth (the lower palette), which was held closed by elastic.  So when we needed to eat people, they could just open the sphincter and go down the hatch.  Literally, a hatch. Our stage had a trap door located directly below this slit, which would open for each death scene, with a stage hand to help swallow the actor, then close the hatch back up to allow the puppeteer their freedom of movement.


Here's the finished product, singing to Seymour.

And here it is just looking menacing.


Some tips on operating this bad boy:

This plant is extra large, and your puppeteer is going to want a stool to sit on between scenes.  When it’s time to talk, the puppeteer can then stand up and start talking.

By bending your knees and suspending your arms, you can move the lower jaw independent of the upper jaw.  This takes a lot of coordination, because we don't usually talk by moving our legs.  This technique is very important for the longer songs, when your arms wear out and you need your legs to pick up the slack.


Don’t underestimate the usefulness of rotation on all 3 axes.  You may have already deduced that Pod 4 can adjust its yaw (ie shaking your head “no”), but changing its pitch (nodding your head “yes”) and its roll (touching your ear to your shoulder) can greatly add to the versatility and emotive range of the pod.  Since our Pod 4 was strapped directly onto the puppeteer’s hips, these motions all came pretty naturally.

Here it is with its graspers laying at its side. Find out about the graspers in Part 5!


Part 0: Introduction
Part 1: The Leaves and Pod 1
Part 2: Pod 2 and the Cuttings
Part 3: Pod 3
Part 4: Pod 4
Part 5: Blooms, Graspers, and All the Rest

Caltech's Greatest Creation: The Making of Audrey II (Part 3: Pod 3)

Pod 3

Unfortunately it was around this point that we fell monstrously behind and had to pull some major overtime to get the plants built, so I don’t have as many pictures.  I’ll try and describe everything adequately.
  • Open and close. Sensing a pattern here?  Well, it’s just as important now as ever
  • Range of motion. Pod 3 really has to emote and essentially dance, and that’s mostly going to come from being able to twist and move its pod around.
  • Waggle roots. Pod 3 can also gesticulate using its roots, which it gets to unfurl during Feed Me. 
  • Eat.  Finally, we get to see Audrey 2 eat someone.  Pod 3 has to be able to swallow Orin’s various pieces on stage.

Now things get fun.  Audrey 2 starts talking (and singing) with Pod 3, which means the puppeteer and the voice are going to have to sync with each other to make it look right.  The puppeteer will have to learn the voice’s cadence exactly, and the voice will have to perform consistently, with the same pacing every night.

When it comes to building Pod 3, we have the following vision in mind:  unlike with a hand puppet, each jaw is controlled by an entire arm of the puppeteer (top jaw by the left arm, bottom jaw by the right arm for us), grabbing onto handles near the top.  The range of motion of the pod is then determined by the shoulder strength, grip, and back flexibility of the puppeteer. The roots are just the puppeteer’s legs, which start crossed, and are then let out mid-song.

The precise size of Pod 3 can vary, but its width is constrained by how far you want the plant to move.  Our plant was a little bit fat, so it couldn’t roll from side to side as much as we may have liked.  Of course, that extra size helped to make the plant bigger and more intimidating, rivaling the size of many productions’ Pod 4.

 The hinge for the pod’s jaw is around the puppeteer’s stomach level, meaning the puppeteer’s shoulder sticks into the mouth area. It might not seem like it would work, but this can be easily covered with more mouth fabric though. 

Pod 3 is large enough that we couldn’t use a papier-mache skeleton anymore, or it would crumble under its own weight.  For Pod 3 and 4, we needed a legitimate armature.  1/8” pencil rod steel provided a sturdy but light and flexible frame.  Each jaw started with a simple ovaloid  for the gums, plus a single semi-circle longways for the upper pallet (like a spine).  Handles were then added to the ends, welded directly to the armature.  At the base (where the puppeteer sticks into the plant), a hole was cut out of the armature and replaced with some extra support around the sides.  Then we just added hinges at the base, and we had a functioning skeleton of the puppet.

So that's what an X-Ray of  Pod 3 looks like.

Now here's the trick for making the body--we used foam.  Medium weight poly open-cell foam.  Foam is light enough to not add too much weight for the puppeteer, but strong enough to retain its shape.  We cut it into strips and laid it over the frame. By cutting them relatively thin (which for us was about 4 inches), we were able to make the body relatively round and smooth, and we could cut and sand the corners.  Here's the second part of the hint: an electric kitchen knife. Cuts through foam like butter. 

 We used various methods to tie the ends to the frame: staples, wire, tape. We didn't really think that one too far ahead.  Then we used spray adhesives to attach each strip of foam to the adjacent strip.

Notice the triangular beak we added to make it look cool.

It took us a godawful amount of time to figure out how to use the spray adhesive.  I think it had something to do with waiting for it to half-dry before sticking pieces together


For a plantlike skin, we went with green felt to match the paint on pods 1 and 2. Of course, if we just wrapped the felt around the armature, it would look like, well, like we wrapped felt around an armature.  We then sewed the felt on top of the foam.

All our various adhesives drying in a well-ventilated area.

For warts, we cut out some small pieces of foam and glued them onto the skin.  We colored the warts similar colors to spots we put on pods 1 and 2, for continuity of look.  The leaves could be simply wrapped onto the armature, glued down, or sewed down and desire.  A simple tube of green fabric was sewed on to the base of the pod to act as a stem.  And once again, the last part of the pod we added was the mouth fabric, simply sewing sheets onto the mouth lining.


As always, mouth fabric goes onto the pod last.

For the roots, we used brown leggings and fashioned some thorns from a similar brown material.  The thorns were made by cutting triangles of fabric, folding them around so they were cone-shaped, and stuffing them with batting.  Then we just sewed them onto the leggings.  The best places for thorns are at the knees and ankles, to cover up the puppeteer’s joints.  Having long “feet” helps to make the roots look better, and we just strapped those onto the leggings with velcro, and covered the velcro with leaves.  We also made a few extra big tubes, stuffed with batting, for a few extra thorns to stick out of the plant.  

The swallowing mechanism for us was a simple hole for the throat. Closing the mouth around the body parts and shaking the plant, as if it were chewing, was usually enough to pull the viscera into the pod.  When it wasn’t, a little simulated peristalsis, by rubbing one hand against the fabric to help push the parts down was enough.  If this doesn’t work for you, many productions make a little tongue, out of red fabric, to cover one arm and used to pull food in.


Audrey 2 gets his first decent meal.


Finally, Pod 3 needs somewhere to rest.  We got a large steal pot, a chair, and some belts.  We cut the legs of the chair, so it was only about 10” tall, bolted it into the pot, and strapped the puppeteer in like with a seatbelt.


It better be a comfortable chair, you'll be sitting there a while.


Caltech's Greatest Creation: The Making of Audrey II (Part 2: Pod 2 and the Cuttings)

No making-of pictures this post! Both Pod 2 and the Cuttings are essentially simple derivatives of Pod 1, with just a few minor modifications.

Pod 2


Functions:
  • Open and close.  Can’t snap at people if you can’t open and close
  • Range of motion.  It’ll look a lot more lifelike if it can actually turn its “head” around. 
  • Conceal Seymour’s arm.  It shouldn’t look like your Seymour’s puppeting the plant and holding it up using a fake arm.
Well, knowing what we know from Pod 1, this one is pretty easy. It follows mostly the same process--papier-mache, wiring for handles, stem, pot, leaves.

We decided to give our Audrey 2 a kind of beak, and that first started to show with Pod 2.  All we needed was some masking tape, which we added onto the end of the upper jaw and cut to look like a beak. A lot simpler than I expected.  

Instead of the bottom, we’ll be putting a hole in the side of the pot. This makes the geometry of the whole thing a little easier--Seymour puts his arm through the side of the pot and up the stem into Pod 2’s pod.

Now obviously we don’t want people to see Seymour’s arm stickin into the pot. So we’re going to throw a jacket on him. He’ll slip one arm into the jacket, and we’ll jam a glove on the other jacket arm and stick it onto the pot. Now we have a fake arm pretending to hold the pot up, while Seymour’s real arm actually holds it up from the inside. We made sure to stuff the arm and put in some dowel rods to keep the arm straight.

It will make your life a lot simpler if you cut a hole in the jacket for Seymour’s real arm to stick through into the pot.  We wanted to keep the jacket afterward, so we had to add some straps to the jacket to keep it on Seymour’s shoulders.

Cuttings


  • The only function the cuttings must fulfill is that they can be put into their pots on stage.  They just have to be kept out of sight until then.

Alright, these should be a snap, just make a littler version of pod 1, and make sure your girls hide them in their pockets or something when they come on stage.  Then they palm them into their pots and show the audience how cute the little guys are.

Saturday, October 5, 2013

Caltech's Greatest Creation: The Making of Audrey II (Part 1: The Leaves and Pod 1)

Leaves
Leaves are on everything, so it’s important to come up with something simple and reproducible here.  Our leaves were made of two layers of green fabric, cut into a leaf shape, and sewed together.  We threaded some heavy multipurpose wiring into the leaves and left plenty of extra wire hanging out the end, so we could attach the leaves to the pods.  In total, we have 5 different sizes of leaves.  For each pod, we arranged 4 or so leaves around the pod base of each pod and a smattering of leaves around the pot of each pod.  We attached size 1 leaves to pod 1, size 2 to pod 2, size 3 to pod 3, and size 5 to pod 4; and we put size 2 leaves around pod 1’s pot, leaving pod 3’s pot bare and pod 4 didn’t even have a pot.
The gray line is a piece of multipurpose wire threaded in through the pointy end.
The dashed line is the channel we sewed in for the multipurpose wire.

Now we can attach the multipurpose wire to the plant and it'll have a leaf stickin out.


Pod 1

The baby Audrey 2. Before we can get into the building of this one, we have to have our list of functions it has to fulfill:
  • Wilt.  Audrey 2 has to show it’s unhealthy by visibly getting weaker on stage, and the simplest way to do that is by having its leaves wilt
  • Open and close its pod, like a mouth.  This is a way for Audrey 2 to show she’s interested when Seymour cuts himself, and opening the pod can be seen easily from even the back rows.  
  • Grow.  We have to show that with a slightly more hearty diet, Audrey 2 has become much healthier.
  • Portable.  Audrey 2 has to be brought on stage, set down, picked back up, and set back down again by Seymour.  
  • Oh yeah, and as a consequence of the above, the puppeteer has to put the puppet on his hand while the puppet is in full view of the audience.

So how do we actually make this plant?  Well, the basic shell of the plant should look relatively hard, and the simplest way to make a hard shape like that is with papier-maché! That’s right! Arts and crafts time!  And how do we make it look pod shaped? Well, we’ll be using balloons for the mold.

I’m not an expert on papier-maché, but the basics are like this: you cut up strips of newspaper, dip them in a paste solution (ours was water and flour), then we lay them down on our mold and let it dry in that position.  So we slapped our pasty newspaper strips onto a balloon and hung it up to dry. Once dried, we laid down an extra layer or two, letting each one dry, until we were confident that the papier-mach would be able to support its own weight.

This is the same method we used to form the shell for pod 2, the blooms, and the cuttings, using balloons of various sizes.

Sarah covers our balloons in papier-maché

All the balloon-maché dries in some strange modern art installation


Once all our layers were dry, we cut the papier-maché balloon pod in half, so we have an upper jaw and a lower jaw.  The balloon is going to pop harmlessly when you first stab into the papier-maché, don’t worry about it, you can just pull out its pieces.  

Now might be a good time to paint your papier-maché.

We hot glued some of our multipurpose wiring into the interior of the of papier-maché pod to act as handles for the puppet.  A major advantage of this wiring is that it is firm enough to hold the papier-maché effectively, but it can be bent easily to fit the puppeteer’s hand.


The wiring glued to the pod as puppeting handles

Then we added the leaves, gluing the wiring into the pod.

The pot with the leaves, sitting next to the pod halves, and the entire workspace being a huge mess


For the sake of keeping the puppet lightweight and low-engineering, we did not put a hinge on pod 1 or 2.  Instead, we glued its stem (just a cylinder of green fabric) onto the pod. This left the pod’s jaws flexible.  This may have been a mistake on our part, as it was a bit difficult to get the jaws to align when opening and closing.  In retrospect, a light hinge may worked better.


Twoie's mouth is open and s/he wants blood.

Now, how do we get this plant to wilt on cue? Well, first, we need to to make our leaves resilient, so the spring back to life after each show. We did it by running some cable ties into them. 


So we put straight channel through the middle and fed a zip tie into that. Healthy resilient leaf now.


 Now to actually make them wilt, we use fishing line. Thread some fishing line from the middle of the leaf through the top of the pot.  Threading it through the middle instead of the top of the leaf makes the wilting look more realistic. Then we thread the fishing line to the back of the pot, into a thumb loop in the back.  The key thing to remember here is that this side of the plant has to always remain upstage so the audience can’t see the thumb loop.


Leaves Healthy

Leaves Wilted

Thumb Ring up
Thumb Ring down


Thumb Ring locked in place on a bolt


As for making Pod 1 grow to show it’s healthy? Just make some extra fabric for the stem, so the puppeteer just has to push their hand up further to make Twoie grow.


All grown and healthy. Not quite ready to eat people yet.

And finally, how do we make it so the puppeteer can put the puppet on in full view of the audience?  Well, we need to have a table for the puppeteer to hide behind. And unless you really hate your puppeteer and want him/her to be stuck under the table for 20 minutes, we need to have the table right at the entrance to the shop, to hide the puppeteer crawling on stage.  


My hiding spot behind the desk.

Nice lighting as the scene changes 

Next, we need that table to have a cutout where the puppeteer can stick their hand up.  You will probably also want to have a removable wedge on the table, so that there isn’t a big hole when the the plant isn't there. Seymour will have to place the plant directly over this hole, then the puppeteer can pull the wedge out.


Now the puppeteer can finally slide pod 1 on their hand.  But what’s this? The puppet fidgets all over the place when you try to put it on? The puppeteer is already minus one hand, how are we going to hold the puppet in place while they put it on?  The puppeteer will have to secure the pot in place first. We used velcro.  As soon as the table wedge was out, the velcro was put in place. Wait, what’s happening now? You’ve secured the pot, but the pod still wiggles all over when you try and put your hand in? Well, we glued some strings to the pod, so when the puppeteer is trying to slide their hand up, they can hold the strings down, holding the pod in place while they slide their hand up.  Oh man, something else? Yeah, you can’t have the velcro and strings hanging out while Seymour’s carrying the pod around, so we need another wedge to plug up the pot until Seymour puts it down.  So now the puppeteer has an intricate routine to perform when the pot is placed down: Pull out the table wedge, pull out the pot wedge, pull down the velcro and secure the pot, pull down the strings and secure the pod, slide your hand up into the pod, and wait for your cue.  If you ask politely, I’m sure Seymour will hold the pot steady for a little while you initiate the securing protocols.

The last thing you should do with Pod 1 (and with every pod) is add the mouth fabric. With the mouth fabric in place, you will no long be able to adjust any of the guts of the pod. It is your last chance to fix anything before the pod is finished.


Wednesday, June 5, 2013

Caltech's Greatest Creation: The Making of Audrey II (Part 0: Introduction)

Where have you been for the past year?

Why hello there!  It’s been a while, hasn’t it? Well, it’s been a busy year, in no small part thanks to the Caltech production of Little Shop of Horrors. The centerpiece of the show, the most difficult and trying project for us, was the design and build of the titular horror, Audrey II.  

With only a month and a half to build the plant, and minimal staff until the weekend before the show, this was never going to be an easy task. And adding to the difficulty was the lack of instructions.  Sure, we leased the play from MTI and they included a “How To Audrey 2” booklet, but the instructions in the book were minimal at best, and injuriously incompetent at worst.  One suggestion was to have the support for the 80+ lb final puppet rest on the neck of the puppeteer!  No thank you.  The Internet at large had no shortage of examples of Audrey II in all its forms: 


But there's no indication of how to build them.  

So for posterity, I present to you the (Un)Official Caltech Guide to Building Audrey II. 

Disclaimer: There are constraints here.  We only had a month and a half to build it, and a month and a quarter of that we only had four people working on it primarily.  If you have a larger workforce or more time, you can get more done.

We also had at our disposal the assistance of an experienced welder to help construct the largest puppets, and if you’re using this as a how-to guide, I understand that you may not have similar skilled labor available.  Hopefully you’ll still find some of this useful.

Disclaimer part deux: This guide is specifically about all of the plant’s capabilities.  Of course there’s spoilers about the play.

What all do you have to build?

Audrey II appears in 4 forms throughout the play, with additional plant forms onstage during the finale. 

Pod 1
Audrey II Pod 1 is not a healthy girl.
Pod 1 comes onstage after Skid Row and stays on stage through Grow For Me. It's gotta look unhealthy, then display a healthy bloodlust to Seymour.  Pod 1 is a simple hand puppet operated by a hidden puppeteer.


 Pod 2
Zowey Powey Holy Cow!

Pod 2 is onstage only during Ya Never Know. This one has to turn about and playfully nip at the girls. Also a simple hand puppet, this one is unique in that it is the only puppet not operated by the main puppeteer, but by the actor playing Seymour.


 Pod 3
Feed Me, Seymour
Pod 3 comes on during Closed for Renovation and stays onstage through the end of the first act. This one has to sing and dance (and eat some entrails).  Pod 3 is still a simple puppet, but big enough it fits the puppeteer’s full body inside it.


 Pod 4
I think it's Suppertime
Pod 4 is onstage through all of Act 2.  This one also has to sing and move, as well as eat people whole. It is a gigantic puppet, requiring the puppeteer to operate each jaw with a great deal of deliberation.  During Sominex/Suppertime II, Audrey II must grasp Audrey 1 with its root/branch


 Blooms
Feed the Plants
The Blooms. Spoiler Alert: The plant wins.  In the end, the characters who were eaten come back with plant accouterments to deliver a final warning (ignore it).  As a bonus, our Blooms could open and close the pods on their heads (a little bit), and the actors controlled Audrey II’s tremendous root graspers.


 Cuttings
They'll Grow and Grow and Grow
The Cuttings are little Audrey II’s that the girls cut off of the big Audrey II during the finale. They don't do anything but look cute (the plants, I mean).

Now you know what you're in for.  I'll join you next time, where we actually start building these bad boys.  Yes, this could have been Part 1, but I think it's easier to have Part numbers correspond to Pod numbers

Part 0: Introuduction